How to install Void Linux
Void Linux live Installer with musl and the Xfce desktop environment
There are two main ways of installing Void Linux: using a live installer image or using a tarball that contains the root file system. Of the two methods, the live installer method is easier. It is similar to the way other Linux distributions are installed. The tarball method, on the other hand, is more complex as it requires the user to already have a solid Linux foundation. It also requires the user to already have access to a Linux distribution to be able to chroot into the system.
Void Linux will be installed using the live installer for computers that have an x86_64 CPU, that uses musl as the standard C library, and contains the Xfce desktop environment. The live installer image will be written to a USB stick to boot into a live version of Void Linux and to launch the installer.
I. Downloading the live installer
You can download the live installer image directly from the
Void Linux website. To download the live installer used in this article, you can click on
the link Live Image musl.

The downloaded ISO image contains all the essential components to boot a live version of Void Linux:
- grub to launch and load the Linux kernel
- the Linux kernel responsible for loading and mounting Void's root file system; loading devices, drivers and modules into the system; and launching runit
- runit, the first process that is executed that supervises and manages all the system's processes
- Void's file system itself, which contains all the operating system files, including the musl C library, and Xfce desktop environment
II. Writing the live installer to the USB stick
The live installer image needs to be written to a USB stick to be able to boot from it and install Void Linux. There are different ways of writing the image file to the USB stick depending on the operating system used.
Warning: writing the live installer to the USB will erase all the contents of the USB.
Using Linux
To write files to the USB stick, you need to have administrative rights, via sudo or be the root user.
After plugging in the USB stick, you need to identify the name of the USB stick. This can be
done by opening a terminal and executing the command sudo fdisk -l to display the
system's disks and partitions. Linux usually identifies the USB sticks and hard drives as
/dev/sdx, where x is a letter, such as a, b, c and so on. The size of the disk
and the disk model can be used to identify the USB stick.

The cat program can then be used to write the live installer to the USB stick. cat needs two pieces of information : 1) the name of the ISO image file; and 2) the name of the USB stick. To write the live installer image to the USB stick using cat:
1. You need to change to the directory where the ISO image was downloaded using the command cd <path to the iso file directory>. In my case, the ISO image was downloaded to the Downloads directory, so I executed the command cd /home/alonso/Downloads.
2. You then execute the ls command to list all the files of the current directory
to confirm that the ISO image is located there and that you are in the correct directory.

3. To write the live installer, you execute the command
sudo sh -c 'cat < iso image file name > > < USB name >'
In my case I executed
sudo cat sh -c 'void-live-x86_64-musl-20240314-xfce.iso > /dev/sda'
The writing process
can take some minutes.

4. Finally, to ensure that all the the data was written, you execute the sync command.

The USB is now ready to go! You can plug in the USB to the computer where Void Linux will be installed and boot the computer.
Using Windows or macOS
You can download balenaEtcher to write the live installer into the USB stick.III. Booting into a live version of Void Linux
If everything went ok, you will see the grub menu when booting the computer. The default option, boots the live system, so you can just hit enter or wait until the timer ends.
Once the booting process has finished, you are logged in automatically into the Xfce desktop environment.
The default username is anon and the password is voidlinux.
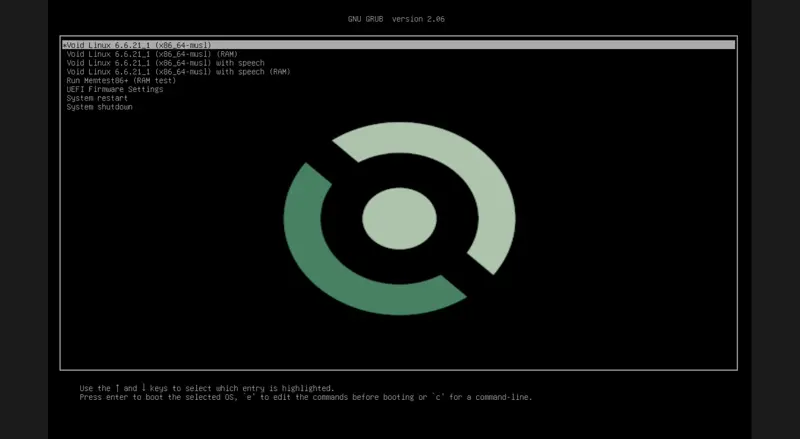
If you have problems booting into the live system, you might need to change the booting order of your computer. This is done via the UEFI settings — usually by pressing F12 or F2 key when booting — and changing the booting order to ensure that the computer boots from the USB stick rather than from the hard drive.
IV. Partitioning the hard drive
Void Linux, like all the other Linux distributions, requires the user to divide the hard drive where the system will be installed into partitions. Each partition functions as if it was a separate hard drive, with its own file system, and is independent of the other partitions. The partitions are stored in either an MBR (Master Boot Record) table or a GPT (Globally Unique Identifier Partition Table).
The type of partition table to use depends on the computer's firmware that is used to boot the operating system. Modern computers use the UEFI firmware to boot the operating system, which requires using a GPT partition table. While older computer ― computers that are more or less older than 15 years ― use the BIOS firmware, which require using an MBR partition table.
When installing a Linux distribution, it is very common to use at least three partitions. The first partition is required to boot the system. The second partition is also required for the root file system. The third partition, known as the swap partition, is not required but recommended. The system uses the swap partition as memory if it runs out of RAM. Void Linux will be installed using a GPT partition table and these three partitions.
The fdisk program will be used to partition the hard drive since it allows the user to create the partitions in an interactive way via the terminal. fdisk prompts the user to specify:
- the hard drive that will be partitioned
- the partition table type
- the partition number
- the size of the partition
- confirms the removal of the existing partition signature (depends on the hard drive's content)
- the partition type
Warning: the article explains how to create a new partition table, so all data in the hard disk will be erased.
Identifying the name of the hard drive
fdisk requires to know the name of the hard drive that will be partitioned. The hard drive name can be identified using the same method that was used to identify the name of the USB. You need to open the terminal and execute the command sudo fdisk -l to list all the storage devices. An SATA or SSD hard drive is usally named /dev/sda, while an NVMEe hard drive is usually named /dev/nvme0n1. The size of the device is a good indicator of the name of the hard drive.
In my case, I am using a virtual machine with a hard drive size of 50G, so the name of my hard
drive is /dev/sda.
Using fdisk to create the three partitions
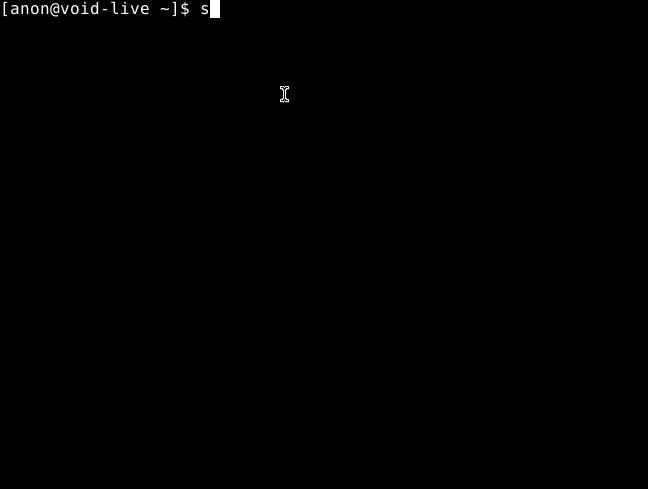
To start the partitioning process, you execute the command sudo fdisk < name of the hard
drive >. In my case, sudo fdisk /dev/sda.

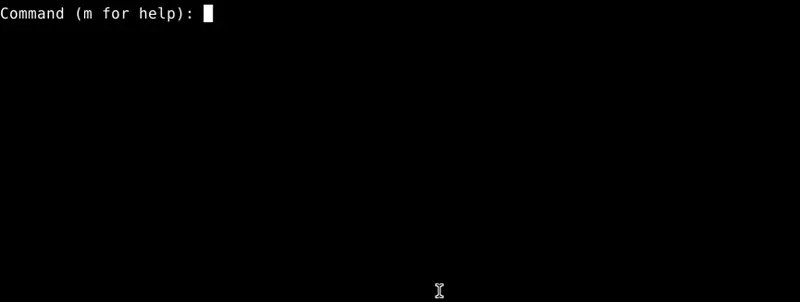
You can then start entering commands into the prompt to partition the hard drive. The commands take the form of a single letter, for example n for a new partition. After typing the command in the prompt, you need to hit enter to execute the command.
Create a new GPT partition table
To create a new GPT partition table, you type g in the command prompt. This new table will
contain the three partitions.

Create the boot partition
The boot partition is responsible for booting the system since this is where the grub boot loader will be installed.
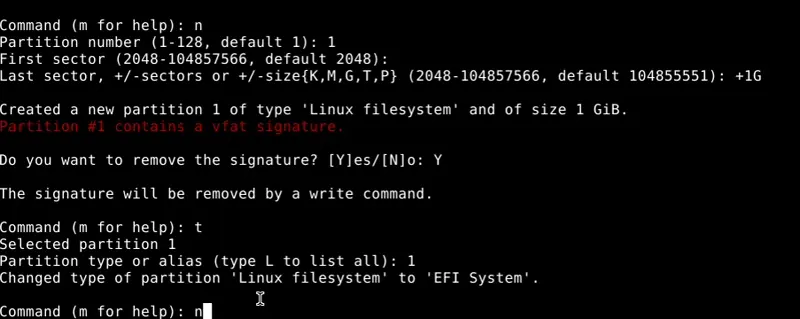
The boot partition will be the first partition of the GPT table, have a size of 1G, and its type will be EFI System.
To create the boot partition you :
- type n to create a new partition
- type 1 to specify the number of the partition
- accept the proposed default first sector by hitting enter
- type +1G as the last sector to specify that that the size of the partition is 1 gigabyte
- confirm removing the existing signature of the partition by typing Y
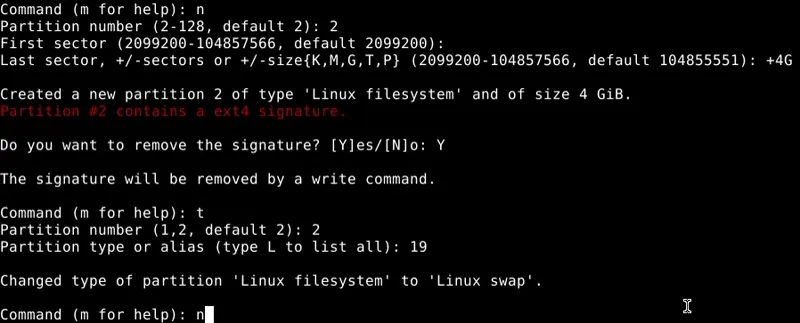
- change the partition type by typing t
- specify the partition type as EFI System by typing 1
Create the swap partition
The swap partition is useful when the computer doesn't have a lot of RAM. Although slower than RAM, the system uses the swap partition as virtual memory if it runs out of RAM. The size of the partition depends on the computer's RAM. According to the Void Linux Handbook, the size of the swap partition for a computer that has 2-8 gigabytes of RAM should be 2xs the amount of RAM; and those that have 8-64 gigabytes of RAM should have at least 4G of swap.
The swap partition will be the second partition in the GPT table, have a size of 4G, and its type will be Linux swap.
To create the swap partition you:
- type n to create a new partition
- type 2 to specify the number of the partition
- accept the proposed default first sector by hitting enter
- type +4G as the last sector to specify that that the size of the partition is 4 gigabytes
- confirm removing the existing signature of the partition by typing Y
- change the partition type by typing t
- specify the second partition by typing 2
- set the partition type as Linux swap by typing 19
Create the root partition
The root partition contains all of the operating system's files, such as user's data, packages, logs and desktop environment.
The root partition will be the third partition of the GPT table, will take all of the space that remains in the hard drive (in my case 45G), and its type will be Linux root (x86-64).
Finally, to create the root partition you:
- type n to create a new partition
- type 3 to specify the number of the partition
- accept the proposed default first sector by hitting enter
- accept the proposed default last sector by hitting enter
- change the partition type by typing t
- specify the third partition by typing 3
- set partition type as Linux root (x86-64) by typing 23
Verify the new partition table
Users have the option of verifying the partition table before actually writing it to the hard disk. In other words, fdisk doesn't touch the hard drive until it receives the writing command.
You can type p into the command prompt to show the partition table that will be written. You should see the GPT partition table with three partitions:
- a 1G EFI System partition
- a 4G Linux swap partition
- a Linux root (x86_64) partition which takes up the rest of the space in the hard drive (45G in my case)
If there is a problem with the partition table, you can type q in the prompt to quit fdisk without altering the hard disk. You can then start the partitioning procedure from zero.
Write the partition table to the hard drive
If everything looks ok, you can type w into the command prompt to partition the hard disk.
The hard drive now has the required partitions to install Void Linux.

V. Installing Void Linux via the installer
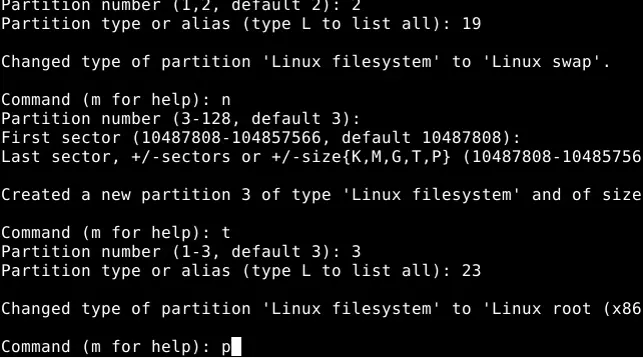
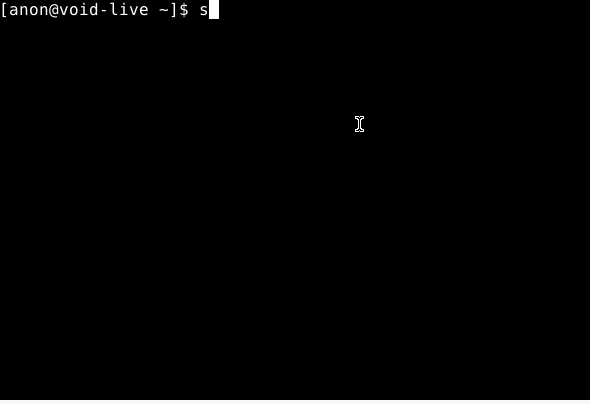
Void Linux can now be installed to the hard drive using the installer that is included in the live installer image. To launch the installer, you execute the command sudo void-installer in the terminal.
To navigation the installer, you need to use the arrow keys and the enter key to set and validate the
various configuration settings.
Set the keyboard layout
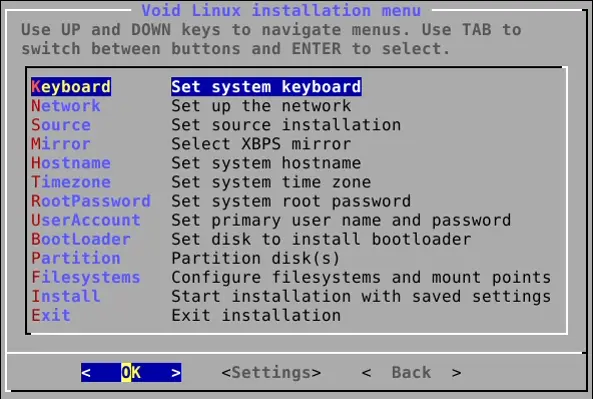
The installer uses the US keyboard layout by default. To change the keyboard layout, you can select the Keyboard - Set system keyboard, and hit enter to see the list of the keyboard layouts.
You then scroll down the list using the down arrow key to select the desire keyboard layout,and then hit enter to validate the selection.
In my case, I set the French keyboard layout fr
Set up the network
You can setup the network via the Network - Set up the network option, but it is not required for the installation. This can be useful when installing Void Linux in a computer that has no access to the internet.
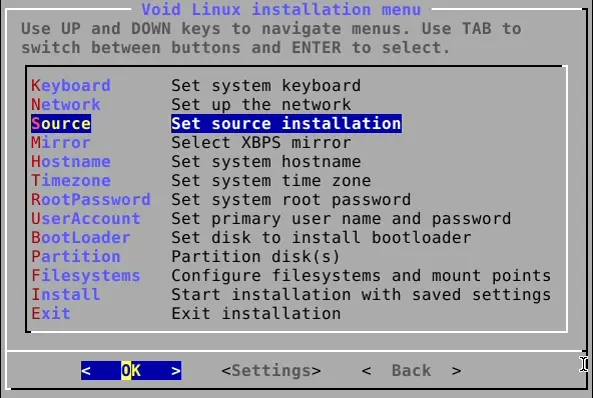
Set source installation
The installer offers users two options for installing the required packages: 1) local packages already stored in the USB stick; or 2) downloading the packages from the official repository. The second option is practical when installing Void in a computer with no internet access.
To install Void Linux using the local packages, you select the option
Source - Set source installation. Then you selects the option
Local Packages from ISO image and then hit enter to validate the choice.
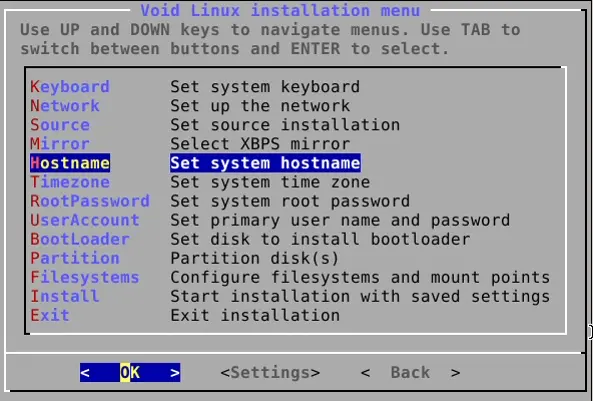
Set system hostname
To specify the hostname of the computer you do it via the option Hostname - Set system hostname.
You just need to type the hostname and hit enter to validate.
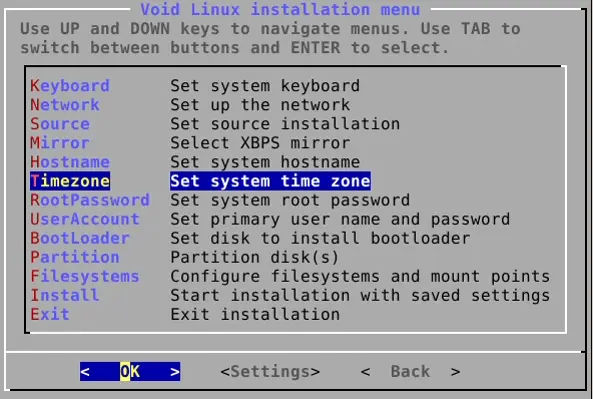
Set system time zone
To configure the timezone, you select the option Timezone - Set system time zone. You first select the continent where you live, then you select the closest city to where you live.
In my case, I chose Europe, then Paris.
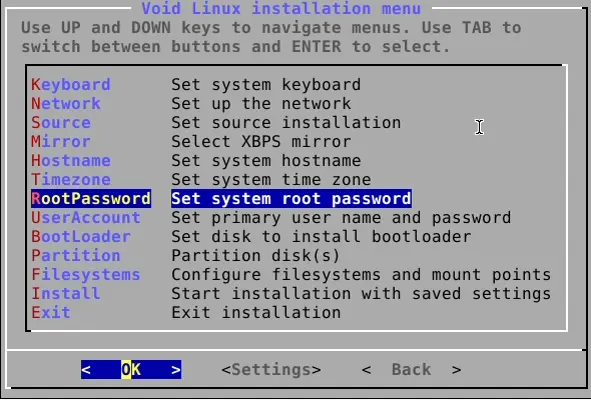
Set system root password
In Linux distributions, the user account that has full administrative rights is known as root.
To setup the password for the root user, you go to UserAccount - Set primary user name
and password. You then type in the password, and retype the password to validate it.
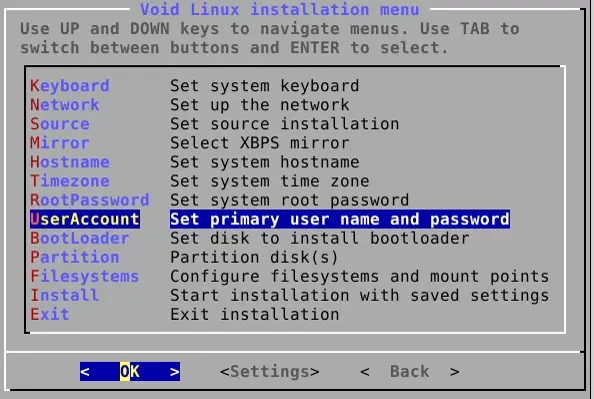
Set primary user name and password
To create a user account, you select the option UserAccount - Set primary user name and password.
1. You will be prompted to type the name of the regular user account. In my case, I set the username to le_melois.
2. You can leave the default value for the display name for login.
3. Then, you setup the user's login password, and type the password again for confirmation.
4. Finally, you select the user's groups. Linux systems manage the user's administrative rights via the
groups that the user belongs to. You can leave the default groups if you want the user to have
administrative rights using sudo. If you don't want the user to have administrative rights,
deselect the group wheel.
Set disk to install bootloader
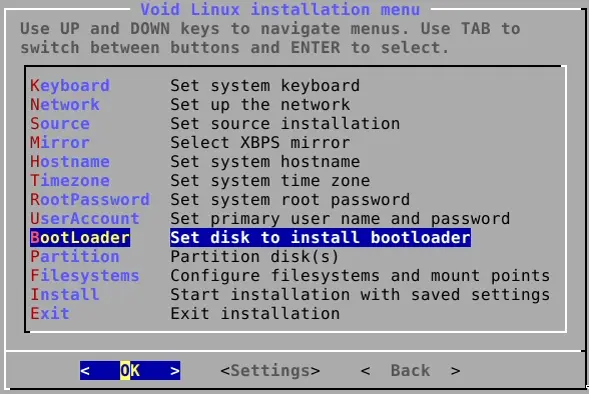
Linux systems require a boot loader to be able to boot into the system. grub is the bootloader that is commonly used in almost all distributions. It is the bootloader that is also used to boot into the live version of Void Linux.
The installer needs to know in which hard drive grub will be installed. This is done via the option BootLoader - Set disk to install bootloader.
1. You need to select the name of the hard drive. If you have multiple hard drives, you can use the size of the hard drive to help you choose the correct one.
2. When asked if you want to use a graphical terminal for the boot loader, select Yes
if you want to boot Void using the grub menu.
Configure filesystems and mount points
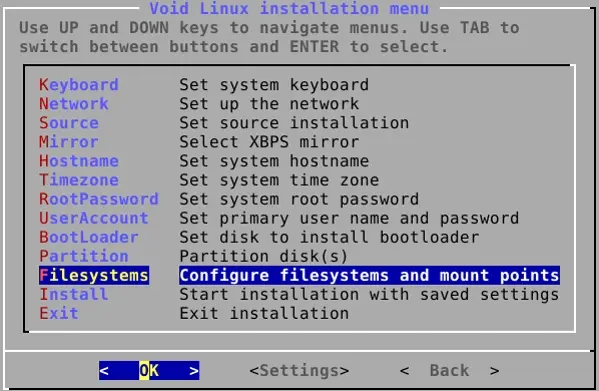
The hard drive has already been divided into three partitions before launching the installer. It is now time to let the installer know how these partitions are to be used, and how the system can access them by specifying their mounting point.
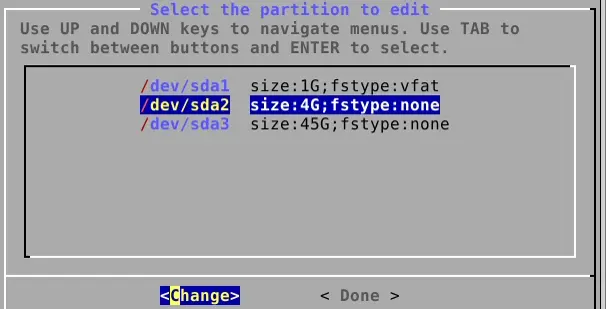
You need to select the option Filesystems - Configure filesystems and mount points. The name, size, and file system type of each partition are displayed. For the moment, the three partitions don't have any filesystems (fstype:none) since they have not been yet formatted.
Formatting and mounting the boot partition
The first partition listed is the boot partition, which is 1G in size. This partition needs to have the vfat file system, and needs to be accessible to the system via the mounting point /boot/efi.
1. You need to select the first partition ― for me, it's the /dev/sda1 partition ― and hit enter to change the file system and specify the mounting point.
2. Then, you need to use the down arrow key to select the vfat - Fat32 file system, and hit enter.
3. For the mounting point, you need to type in /boot/efi
4. When asked if you want to create a new filesystem, you select yes, and
hit enter to validate.
Making the swap partition
The second partition listed is the swap partition, which is 4G in size. This partition needs to be formatted to Linux swap, and doesn't have a mounting point.
1. You need to select the second partition ― in my case, it's /dev/sda2 ― and change the file system type.
2. Then, you select Linux swap for the file system type.
3. When asked if you want to create a new filesystem, you also select yes.
Formatting and mounting the root partition
Finally, the third and last partition in the list is the root partition, which contains all the files of the Void Linux system. The size of this partition is whatever space was left in the hard drive after the boot and swap partition were created. In my case, the root partition size is 45G.
1. As with the other two partitions, you select the third partition, and then hit enter to change the file system type and specify the mounting point.
2. You need to select the option ext4 Linux ext4 (journal).
3. You type in / as the mounting point.
4. You also select yes when asked if you want to create a new filesystem.

The partition list should now look like this:
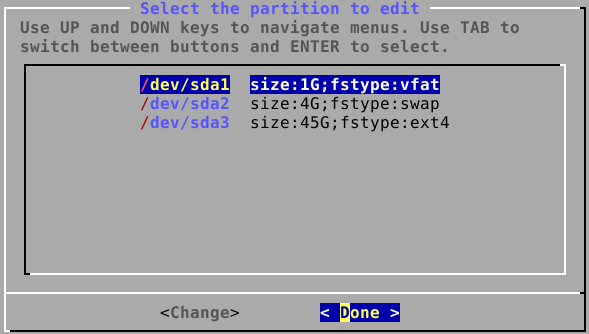
If everything looks ok, you then use the right arrow key to select the option Done, and hit enter to save the partitions' file system and mounting point settings.
Start the installation
Now that the installer has been configured, it is finally time to launch the installation of Void Linux.
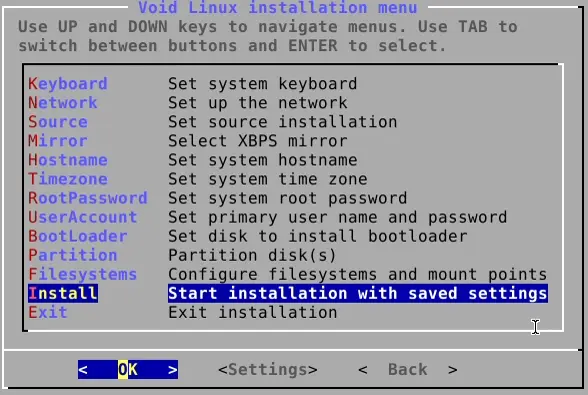
You can launch the installation through the option Install - Start installation with saved settings. The installer will display a summary of the mounting points, and a warning that all data will be destroyed from the selected hard drive.
Select Yes and hit enter to start installing Void Linux to the hard drive.
VI. Boot into the newly installed Void Linux system
Once the installer has finished copying all the files, you will receive a confirmation message
that Void Linux has been installed.

You can reboot the system, and remove the USB key to boot into the freshly installed Void Linux
system. You are now ready to plunge into the Void!

Let me know if you're interested in seeing a video on how to install Void Linux.